2. Run the code
Resizing and Rescaling Image
import cv2 as cv
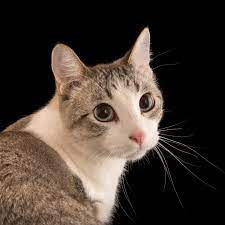
img = cv.imread('Photos/cat1.jpeg')
cv.imshow('Cat',img)
def rescaleFrame(frame, scale =0.75) :
# create a function . 0.75 - resized to 75 percent
# works for images,videos and live videos
width = int (frame.shape[1] * scale) # 0 is width
height = int (frame.shape[0] * scale) # 1 is height
dimensions = (width,height)
return cv.resize(frame,dimensions,interpolation = cv.INTER_AREA)
resized_image =rescaleFrame(img)
cv.imshow('Image',resized_image)
# def changeRes(width,height):
#only for live videos
#capture.set(3,width)
#capture.set(4,height)
#read videos
capture = cv.VideoCapture('Videos/Test Flight.mp4') # capture is variable .
inside () - 1. a path to video file as the current code
2. as numbers can be assigned or inserted. Example : (1) - Camera/Webcam connected to laptop
while True:
isTrue,frame = capture.read()# read video frame by frame
frame_resized = rescaleFrame(frame)
cv.imshow('Video',frame) # display as individual frame
cv.imshow('Video Resized', frame_resized)
if cv.waitKey(20) & 0xFF==ord('d'): #stop the video from play indefinitely when d is pressed
break # break while loop
capture.release ()
cv.destroyAllWindows()
Draw and Write on Images
Code 1 : Display blank image
import cv2 as cv
import numpy as np
blank = np.zeros((500,500),dtype = 'uint8') #size of blank image
cv.imshow('Blank',blank)
img = cv.imread('Photos/cat1.jpeg')
cv.imshow('Cat',img)
cv.waitKey(0)
Code 2 : Paint the image a certain color
import cv2 as cv
import numpy as np
blank = np.zeros((500,500,3),dtype = 'uint8')#(height,width,number of colour channels)
#size of blank image
cv.imshow('Blank',blank)
blank [:] = 0,255,0 # colour . Explore how to do this
cv.imshow('Green',blank)
cv.waitKey(0)
Code 3 : Draw a rectangle
import cv2 as cv
import numpy as np
blank = np.zeros((500,500,3),dtype = 'uint8')#(height,width,number of colour channels) #size of blank image
cv.imshow('Blank',blank)
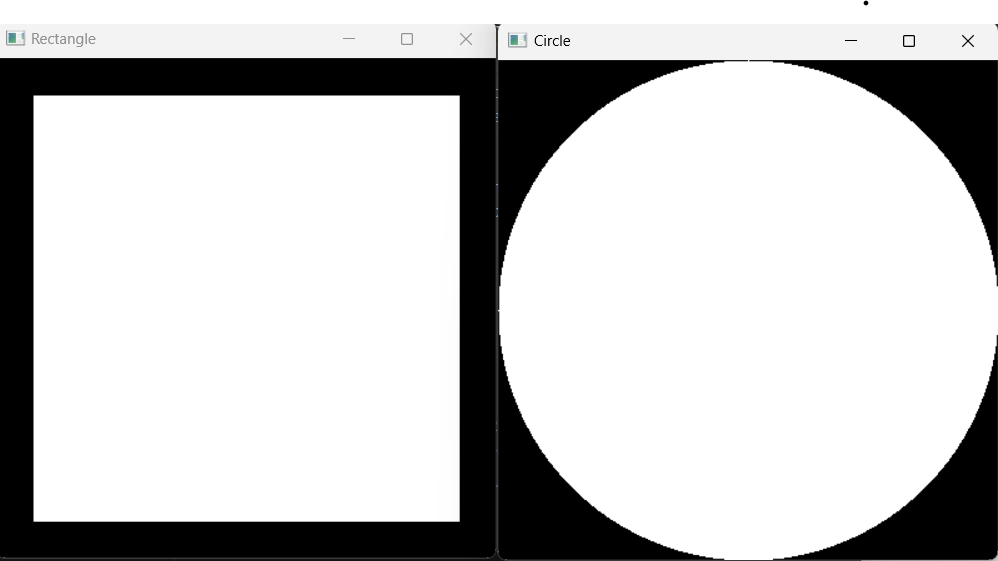
cv.rectangle(blank,(0,0),(250,250),(0,255,0), thickness = 2)
#(0,0) - origin
#(250,250) - end point
#(0,255,0) - green
#thickness = 2 - line thickness
#thickness = cv.FILLED - to fill image with green
#thickness = -1 - to fill image with green
cv.imshow('Rectangle',blank)
cv.waitKey(0)
Code 4: Draw a circle
import cv2 as cv
import numpy as np
blank = np.zeros((500,500,3),dtype = 'uint8')#(height,width,number of colour channels) #size of blank image
cv.imshow('Blank',blank)
cv.circle (blank,(250,250),40,(0,0,255) , thickness = 2)
#(250,250) - centre of frame
# 40 - radius
#(0,0,255) - red
#thickness = 2 - line thickness
cv.imshow('circle',blank)
cv.waitKey(0)
Code 4 - Draw line
import cv2 as cv
import numpy as np
blank = np.zeros((500,500,3),dtype = 'uint8')#(height,width,number of colour channels)
#size of blank image
cv.imshow('Blank',blank)
cv.line(blank,(0,250),(250,250),(255,255,255) , thickness = 2)
#(0,250) - origin
#(250,250) - end
#(255,255,255) - white
cv.imshow('line',blank)
cv.waitKey(0)
Code 5 - Write text
import cv2 as cv
import numpy as np
blank = np.zeros((500,500,3),dtype = 'uint8')#(height,width,number of colour channels)
#size of blank image
cv.imshow('Blank',blank)
cv.putText(blank,'Hello', (225,225), cv.FONT_HERSHEY_SCRIPT_COMPLEX,1.0,(0,255,0),
thickness=2)
# 'Hello' - text
# (255,255) - coordinate of text
# cv.FONT - font
# 1.0 - scale
# (0,255,0) - color
# thickness = 2 - line thickness
cv.imshow('Text',blank)
cv.waitKey(0)
5 Essential Function
Code 1 : Converting image to gray scale
import cv2 as cv
img = cv.imread('Photos/cat1.jpeg')
cv.imshow('cat1',img)
gray = cv.cvtColor(img,cv.COLOR_BGR2GRAY)
#cv.COLOR_BGR2GRAY- convert color (from)to(another color)
cv.imshow('Gray',gray)
cv.waitKey(0)
Code 2 : Blurring image
import cv2 as cv
img = cv.imread('Photos/cat1.jpeg')
cv.imshow('cat1',img)
blur = cv.GaussianBlur(img,(3,3), cv.BORDER_DEFAULT)
# (3,3) - blurness . increase this and pic gets blurer
cv.imshow('Gray',blur)
cv.waitKey(0)
Code 3: Edge Cascade
import cv2 as cv
img = cv.imread('Photos/cat1.jpeg')
cv.imshow('cat1',img)
canny =cv.Canny(img,125,175)
# 125.175 - threshhold value . change img to blur to reduce the amount of edges
cv.imshow ('Canny edges',canny)
cv.waitKey(0)
Result
Code 4 : Dilate image
import cv2 as cv
img = cv.imread('Photos/cat1.jpeg')
cv.imshow('cat1',img)
canny =cv.Canny(img,125,175)
# 125.175 - threshhold value
cv.imshow ('Canny edges',canny)
dilated = cv.dilate(canny,(7,7),iterations =3)
cv.imshow('cat1',dilated)
cv.waitKey(0)
Result
Code 5: Erode Image
import cv2 as cv
img = cv.imread('Photos/cat1.jpeg')
cv.imshow('cat1',img)
canny =cv.Canny(img,125,175)
# 125.175 - threshhold value
cv.imshow ('Canny edges',canny)
dilated = cv.dilate(canny,(7,7),iterations =3)
cv.imshow('cat1',dilated)
eroded = cv.erode(dilated,(7,7),iterations =3)
cv.imshow('cat1',eroded)
cv.waitKey(0)
Result
Code 5 : Resize and Cropimport cv2 as cv
img = cv.imread('Photos/cat1.jpeg')
cv.imshow('cat1',img)
#Resize
resized = cv.resize(img,(500,500),interpolation =cv.INTER_CUBIC)
#(500,500) - destination size or size of resizing
# cv.INTER_LINEAR - to scale to larger image
# cv.INTER_CUBIC - to scale to larger image with better quality
# cv.INTER_AREA - to shrink
cv.imshow('resized', resized)
cv.waitKey(0)
Code 6 : Crop (not verified)
import cv2 as cv
img = cv.imread('Photos/cat1.jpeg')
cv.imshow('cat1',img)
#crop using array slicing
cropped = img[50 :200, 200:400]
#[50:200,200:400] - region to crop
cv.imshow('Cropped', cropped)
cv.waitKey(0)
Translating Image
import cv2 as cv
import numpy as np
img = cv.imread('Photos/cat1.jpeg')
cv.imshow('cat1',img)
#translation - shifting image along x -axis and y-axis
def translate(img,x,y):
#(img,x,y) - x and y represents number of pixels you want to shift along
the x-axis and y-axis
trasMat = np.float32([[1,0,x],[0,1,y]])
#transMat - which is known as translation matrix is used to translate image
dimensions = (img.shape[1], img.shape[0])
# img.shape[1] - width
# img.shape[0]- height
return cv.warpAffine(img,trasMat,dimensions)
# -x -- Left
# -y -- Up
# x -- right
# y --Down
translated = translate(img, 100, 100)
# (img, 100, 100) - shifting right by 100 pixels and down by 100 pixels
cv.imshow('translated',translated)
cv.waitKey(0)
Rotation
import cv2 as cv
import numpy as np
img = cv.imread('Photos/cat1.jpeg')
cv.imshow('cat1',img)
#rotation by some angle
def rotate (img,angle,rotPoint=None):
#rotation function
(height,width) = img.shape[:2]
if rotPoint is None:
rotPoint = (width//2,height//2)
#rotate around centre
rotMat = cv.getRotationMatrix2D(rotPoint,angle,1.0)
#rotMat - rotation matrics
#(rotPoint,angle,1.0) - rotationpoint, angle, scale value
dimensions = (width,height)
return cv.warpAffine(img,rotMat,dimensions)
rotated = rotate(img,45)
cv.imshow('rotated',rotated)
rotated_rotated = rotate(rotated, -45)
#rotated_rotated = rotate(rotated,45) - rotated, rotated image
cv.imshow('rot',rotated_rotated)
cv.waitKey(0)
Fliping image
import cv2 as cv
import numpy as np
img = cv.imread('Photos/cat1.jpeg')
cv.imshow('cat1',img)
#flip
flip = cv.flip(img,1)
# 0 - flipping image vertically (x-axis)
# 1 - flipping image horizontall (y-axis)
# -1 -flipping image both harizontally and vertically
cv.imshow('flip',flip)
cv.waitKey(0)
Contour Detection
- to find out how many contours are there
import cv2 as cv
img = cv.imread('Photos/cat1.jpeg')
cv.imshow('Cats',img)
#contour detection - which are boundaries of object. contours and edges are two different things
gray = cv.cvtColor(img,cv.COLOR_BGR2GRAY)
#convert image to grey scale
cv.imshow('gray', gray)
canny = cv.Canny(img,125,175)
#grab the edges
# (125,175) -threshold value
cv.imshow('canny',canny)
contours,hierarchies = cv.findContours(canny,cv.RETR_LIST,cv.CHAIN_APPROX_NONE)
#cv.(something as below) - mode to find contour
#cv.RETR_TREE - all hierarchical contour
#cv.RETR_EXTERNAL - external contour only
#cv.RETR_LIST - all contour
#cv.CHAIN_APPROX_NONE - contour approximation ; take all points
#cv.CHAIN_APPROX_SIMPLE - only takes end points
print(f'{len(contours)} contour(s) found')
cv.waitKey(0)
Result
Finding edges by blurring image
import cv2 as cv
img = cv.imread('Photos/cat1.jpeg')
cv.imshow('Cats',img)
#contour detection - which are boundaries of object. contours and edges are two different things
gray = cv.cvtColor(img,cv.COLOR_BGR2GRAY)
#convert image to grey scale
cv.imshow('gray', gray)
#blur
blur =cv.GaussianBlur(gray,(5,5),cv.BORDER_DEFAULT)
cv.imshow('Blur',blur)
canny = cv.Canny(blur,125,175)
#grab the edges
# (125,175) -threshold value
cv.imshow('canny',canny)
contours,hierarchies = cv.findContours(canny,cv.RETR_LIST,cv.CHAIN_APPROX_SIMPLE)
#cv.(something as below) - mode to find contour
#cv.RETR_TREE - all hierarchical contour
#cv.RETR_EXTERNAL - external contour only
#cv.RETR_LIST - all contour
#cv.CHAIN_APPROX_NONE - contour approximation ; take all points
#cv.CHAIN_APPROX_SIMPLE - only takes end points
print(f'{len(contours)} contour(s) found')
cv.waitKey(0)
Result
Notice the number of contours reduced when blurred
Finding edges by threshold method
import cv2 as cv
img = cv.imread('Photos/cat1.jpeg')
cv.imshow('Cats',img)
#contour detection - which are boundaries of object. contours and edges are two different things
gray = cv.cvtColor(img,cv.COLOR_BGR2GRAY)
#convert image to grey scale
cv.imshow('gray', gray)
#threshold - looks at image and binarize the image
ret,thresh = cv.threshold(gray,125,255,cv.THRESH_BINARY)
#gray - take it gray image
#125 - threshold value
# 255 - maximum value
# Below 125 - set to black
# Above 125 - set white
#cv.THRESH_BINARY - to binarize image
cv.imshow('thresh', thresh)
contours,hierarchies = cv.findContours(thresh,cv.RETR_LIST,cv.CHAIN_APPROX_SIMPLE)
#cv.(something as below) - mode to find contour
#cv.RETR_TREE - all hierarchical contour
#cv.RETR_EXTERNAL - external contour only
#cv.RETR_LIST - all contour
#cv.CHAIN_APPROX_NONE - contour approximation ; take all points
#cv.CHAIN_APPROX_SIMPLE - only takes end points
print(f'{len(contours)} contour(s) found')
cv.waitKey(0)
Result
Drawing contour on a blank page
- can use blur or threshold method
- use canny method first and then find the contour using that
- threshold method has disadvantage
import cv2 as cv
import numpy as np
img = cv.imread('Photos/cat1.jpeg')
cv.imshow('Cats',img)
blank = np.zeros(img.shape, dtype ='uint8')
cv.imshow ('Blank', blank )
#contour detection - which are boundaries of object. contours and edges are two different things
gray = cv.cvtColor(img,cv.COLOR_BGR2GRAY)
#convert image to grey scale
cv.imshow('gray', gray)
#threshold - looks at image and binarize the image
ret,thresh = cv.threshold(gray,125,255,cv.THRESH_BINARY)
#gray - take it gray image
#125 - threshold value
# 255 - maximum value
# Below 125 - set to black
# Above 125 - set white
#cv.THRESH_BINARY - to binarize image
cv.imshow('thresh', thresh)
contours,hierarchies = cv.findContours(thresh,cv.RETR_LIST,cv.CHAIN_APPROX_SIMPLE)
#cv.(something as below) - mode to find contour
#cv.RETR_TREE - all hierarchical contour
#cv.RETR_EXTERNAL - external contour only
#cv.RETR_LIST - all contour
#cv.CHAIN_APPROX_NONE - contour approximation ; take all points
#cv.CHAIN_APPROX_SIMPLE - only takes end points
print(f'{len(contours)} contour(s) found')
#drawing contour on blank image
cv.drawContours(blank,contours,-1, (0,0,255), 2)
# -1 - how many contours do we want, since we want all of them, its -1
# (0,0,255) - red
# 2 - thickness
cv.imshow('contours', blank)
cv.waitKey(0)
Result
Switch color spaces in OpenCV
1. convert BGR image to HSV
import cv2 as cv
img = cv.imread('Photos/car1.jpeg')
cv.imshow('cat1',img)
# convert BGR to HSV
# HSV - based on how huma think and conceive color
hsv = cv.cvtColor(img, cv.COLOR_BGR2HSV)
cv.imshow('hsv',hsv)
cv.waitKey(0)
Result
Code 2 : Convert BGR to Lab
import cv2 as cv
img = cv.imread('Photos/cat1.jpeg')
cv.imshow('cat1',img)
#convert BGR to Lab
lab = cv.cvtColor(img, cv.COLOR_BGR2Lab)
cv.imshow('lab', lab)
cv.waitKey(0)
Result


Comments
Post a Comment